Wondering why you struggle with balance and stability in your yoga practice? Working toward some difficult poses? Start with strengthening your core! A strong core is a good foundation for any yoga practice, but it’s especially useful for standing poses, balancing poses, inversions, and arm balances. This well-rounded ab burner is made up of 15 moves from my go-to home core workout. No equipment needed!
I recommend doing each move for 1 minute (with about 10 seconds in between to transition) so that you’ll get a nice 15-minute core workout that you can add on to the beginning or end of your practice. I love the Intervals Pro app for timing workouts (the free version is great). While you’re doing core workouts (or any workout for that matter) make sure that you’re exhaling on the effort. For example, if you’re doing crunches, you will exhale as you crunch up and inhale as you rest your head back down.
Ready to get a little sweaty while you build a strong yoga core to up-level your yoga practice? Join me for this Yoga Core Workout.
Move 1: Double Leg Lift
This move works your lower abs and brings awareness to your pelvic floor (an essential part of a strong core!). On your back with your legs extended up toward the ceiling, keep your legs straight and lower your heels toward the floor, making sure your lower back doesn’t lift off the mat. You can prevent your lower back from lifting by bringing your hands underneath your tailbone onto the floor (like I’m doing below) and/or by not lowering your legs quite so far down.
Move 2: Plank with Shoulder Tap
Planks are my favorite core workout because they train your core to do exactly what it’s made for: stabilize. Your core isn’t just the abdominal muscles you can see. It’s all of the muscles in your torso that keep your spine aligned! For that reason, every other workout in this sequence will be a plank or side plank variation, because I want you to work your whole core, not just your abs. This one is a classic high plank with an alternating shoulder tap. Make sure your hips stay in the same place instead of swaying side to side as you lift your hands to tap opposite shoulders.
Note: all of these plank variations can also be done on the knees.
Move 3: High/Low Boat
This move is inspired by the yoga pose Navasana, Boat Pose. Sit up straight, extending your spine, bend your knees, and lean back toward your tailbone. You’ll be using your entire rectus abdominis (the center of your core) and your hip flexors to help you move from the high to low position in Navasana. There are 3 levels you can choose from:
Level 1: toes on ground
Level 2: toes lifted with knees bent
Level 3: Legs straight
Move 4: Side Forearm Plank with Hip Dip
This move works your shoulder just as much as your abs! In your forearm plank, dip your hip down until it almost touches the floor, and then raise it back up. Switch sides after 30 seconds!
You can either do this with your knees lifted or on the floor.
Move 5: Heel Taps
Some people call these heel taps, floor slides, or penguins. No matter what you call it, this move will seriously work your obliques: the sides of your waist. On your back with the soles of your feet on the floor underneath your bent knees, you’ll reach from one heel to the other with your hands down by your sides. Not feeling the burn? Scoot your heels further away from your body.
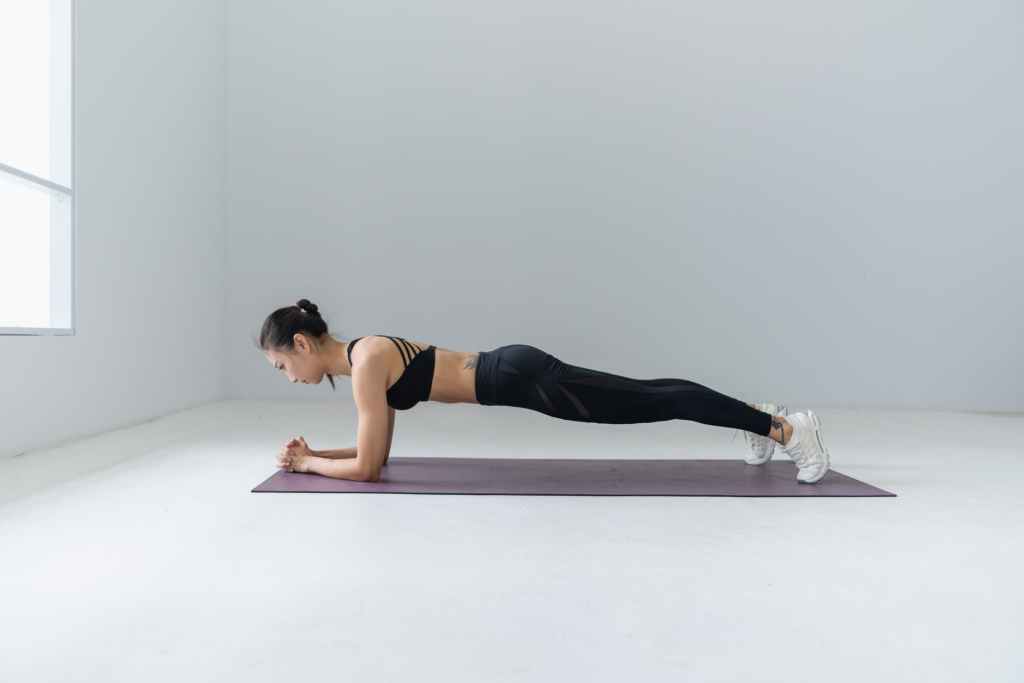
Move 6: Plank with Hip Rainbows
In your forearm plank, move your hips from side to side in a half-circle motion like you’re drawing a rainbow with your pelvis! Make sure you’re not sticking your booty too far in the air, though. This move works your whole body, so hopefully you’re starting to break a sweat!
You can also do this move on your knees.
Move 7: Alternating Overhead Toe Taps
Lying down on your back with your legs straight above your hip points, flex your feet toward your face and use your fingertips to tap opposite toes. (left hand taps right foot, right hand taps left foot). For an extra challenge, point your toes and try to tap them! This twisting motion is great for working your transverse abdominals.
Move 8: Side Plank with Side Crunch
Coming back into your side plank on one hand, use your obliques to draw your top knee into your top elbow, making a little side crunch motion. This move requires lots of strength and balance! Switch sides after 30 seconds.
You can modify by coming down to your knee.
Move 9: Slow Bicycle
Lying on your back, bend one knee and tap it to the opposite elbow as you extend the other leg out in front of you. Continue alternating sides as slowly as possible. The slower you go, the more difficult this move becomes! Focus on twisting your torso here so that it’s almost like you’re trying to bring your knee to the opposite armpit instead of the opposite elbow. This will really help you tap into your transverse abdominals here.
Move 10: Plank with Knee Cross
In your high plank, cross one knee under your body to tap the opposite elbow. Repeat this move on the other side and continue to alternate for the rest of this minute! Make sure you stay in one long, straight line from the crown of your head to your heels, just like a plank of wood. No booties in the air!
To modify this move on your knees, come to a tabletop and cross your knees underneath your body to tap opposite elbows.
Move 11: Butterfly Crunch
Bring your legs into a butterfly shape: the soles of your feet touch each other, and your knees drop out wide. Lying down onto your back, you can either interlace your hands at the nape of your neck to support your head or bring your hands to extend out in front of you with pointer fingers extended forward. On your exhale, crunch up, and on the inhale, rest your head back on the mat. Move with your breath!
Move 12: Side Plank with Thread the Needle
From a side plank on your hands, reach underneath you with your top hand so that your top hand comes under your torso and behind you. This will cause your torso to turn slightly toward the ground and will really work your obliques! After you twist, reach back up to the sky and repeat, switching sides after 30 seconds.
You also have to option to drop to your knees!
Move 13: Reverse Crunch
Lie down on your back and bring your legs to a tabletop position. Interlace your hands at the nape of your neck to support your head. Use your lower abs to lift your tailbone off the mat, which will bring your knees closer to your face. At the same time, use your upper abs to lift your head, neck and shoulder blades off the mat. Maybe you’ll even be able to tap your elbows to your knees at the top! It looks like this:
If you want to level up, you can extend your legs straight above your hips, using your lower abs to lift and lower your tailbone from the mat. Keep your head, neck, and shoulders lifted from the mat the whole time!
Move 14: Plank Jack
Our last plank of the workout is a cardio push! By now, hopefully you’re a little sweaty and breathing harder than usual, so let’s keep it up! From your high plank, hop your feet out to the width of your yoga mat, and then hop them back together to meet in the middle. Make sure that your hips stay stable while you do this, not piking up or dipping down as you hop.
You also have the option to step in and out of your plank jack if you’re not up for cardio, you don’t want to make noise jumping, or you have sensitive knees!
Move 15: Russian Twist
We made it to the last move! This is a mix between a classic Russian twist and Navasana, Boat pose. You’ll be seated with a tall spine, knees bent and hands in a prayer position at heart center. Use your transverse abdominals to twist from side to side, possibly tapping elbows on the ground as you twist. There are 3 options for your legs in this move to increase difficulty:
Level 1: Toes down
Level 2: Toes lifted and knees bent
Level 3: Legs extended
Did you make it through the whole workout? Nice job! If you enjoyed strengthening your core with me, let me know in the comments and share this workout with a friend!
